flickr.............picasa.............twitter.............tumblr.............pinterest.............recipes.............crafty.............about me

Thursday, July 30, 2009

Farmer's Market

T and I went to the Brookline Farmer's Market today to get our weekly bunch of produce and fish. It's been great this summer to get local food--the fish is so fresh and tasty, and the produce is so good! We had roasted beet salad for dinner tonight, and we got some lovely sweet onions (which will go in the roast chicken pot on Sunday!), eclectic carrots, and tasty radishes. A few weeks ago, I got some garlic scapes. This week they have harvested the garlic, which is so good...
and so huge.
Next week we'll get some honey. *Ahem* I hope it's as tasty as the honey this bumblebee will make "for [bumblebee] babies, in very small pockets scattered around the neighborhood" :) (love you, Ben!)
Posted by Picasa

Tuesday, July 28, 2009

Sew Exciting!

Not that I currently have any reason to sew one of these for myself, but I loved the material and, after all, I need the practice to make one for each of my sisters, right? :)
I have been wanting to sew a baby carrier for a while, but I couldn't find anyone who needed one or wanted one (they all had slings or Bjorn carriers or backpacks). So... I decided to wait until I needed one myself.
But even that was taking too long, so I talked my oldest sister into letting me make one (this one, if I can swing it) for her. And then I thought, why not make one for my other sister-who's-a-mother, too? Yesterday we all got on the phone together and picked out our materials. I am amazed at how different each carrier will be. Admittedly, I really like all three sets, but I would never have picked Summer's or Bethany's materials for myself. Each of ours is very individual--just like we are.
Here are our selections. The first two materials will be the main body (the carrier is reversible); the next material will be the hood; the last material is for the straps.
I'm going to make mine first, since I have an exact tutorial for that one. Then I'll see if I can modify the process to get it closer to the toddler carrier. [I hope that's not an infringement on copyright or anything.] I'm really excited to get started. I wish the material would hurry up and get here! (haha, yes, I just placed the order yesterday, so it'll be a week or more...)
I don't know if my sister-in-law does (or will be doing?) much baby-wearing, since her youngest is currently 2, but if you want one, H, let me know! Also, Viv--you're in the same boat as me not "needing" one, but I don't want you to feel left out, so if you want to pick out some material, I'll make you one, too :D

Monday, July 27, 2009

Shake a Leg!

of lamb, that is!
Taylor and I have been fortunate enough to be able to get great meat (naturally raised, grass-fed) from a not-too-distand farm. I have really enjoyed the system so far because the type and cut of meat from month to month is pretty random, so it keeps things mixed up for me without much thought on my part :) The less I have to think about the better, right?
It's also helped me broaden my recipe repetoir in the kitchen. I mean, chicken is good, but there are only so many ways I'm willing to prepare it :) So it's been nice to have different sausages, smoked meats, lamb!, and nice whole chickens (oh they're so much better than the chickens we got before) to experiment with. It's also great for us because the meat usually comes in cute "just right for two" packages :)
This is what I came up with last night, at any rate. Enjoy if you will!
Quick recipe for tasty leg of lamb (also works great for lamb chops!) serves 2 In a paper lunch bag, mix: 1/4 c whole grain flour (I used spelt) salt and pepper to taste (also could use paprika, if desired) 3 T milled flax seed (adds a nice hint of nuttiness to the lamb flavor) Place each piece of lamb in the bag and shake until thoroughly coated. Place on broiler pan and broil 4-6 minutes on each side (depending on your tastes).
[tip: if you have leftover shake-it-up mix, roll up the paper bag, put the whole thing in a zip loc bag (and label it) and stick it in the freezer for next time.] Serve with leftover rice and steamed green beans:
Drizzle olive oil into skillet and sprinkle with paprika (to taste). Add rice to skillet and spread 1-2 T dried onion over rice (or you can use fresh onion). Rinse green beans thoroughly and layer on top of rice and onions (don't dry the beans--the extra water will help steam the beans and warm up the rice). Cover skillet and cook on low heat until beans are tender (about 15 minutes). Stir to combine before serving.
Posted by Picasa

Sunday, July 26, 2009

Reality

St. Clement Eucharistic Shrine, the church where T and I go to Mass (most of the time), is starting perpetual adoration (which is completely awesome).
And, like any good marketer would, they're advertising a great opportunity to those who are brave enough to take the risk:
Posted by Picasa
They have the ads inside the T as well, right alongside "Guaranteed Swahili" (Boston Language Institute), stark iPhone ads, "Part time education, full time excellence" night school ads, and "change is good" food ads. Genius :)

Saturday, July 25, 2009

New Header

I know that many of you read my blog through email or through google reader (or facebook), and so don't visit the actual website very much (renidemus.blogspot.com). So, I thought I'd post a note announcing that I have changed my header picture. I take enough pictures now'days that I figure I should use them on my blog, if nowhere else :) I'm going to try to change the header to (sort of) correspond to what's going on in my life, on the way.
Right now it's summer time, and the earth is full of life. Even in Boston there is a lot of green around. Vibrance and life is all around me...

Friday, July 24, 2009

Coconut Milk Ice Cream

I love coconut milk. I've made scones with it, and soup and sauces and pancakes. But then I found a recipe for coconut ice cream :) I had to try it.
So I did.
And it was delicious!
Here is the ice cream recipe:
[I have a 1.5 qt. ice cream maker, adjust the amount of liquid in this recipe if yours is larger or smaller]
1 15-oz. can coconut milk (I never buy the "lite" versions. Coconut fat is really good for you)
Milk to make 3 c. liquid (I used hemp milk--I'm sure you could use soy milk, too)
1 tsp vanilla
1/4-1/2 c sugar (I put in a 1/2 c and it was a little too sweet for me. The cocunut doesn't need much sweetness at all. You could also use agave nectar or maple syrup. I've never tried honey in ice cream--anyone know how that works?)
I also added candied coconut pecans (I like nuts in my ice cream). So here's the recipe for that:
1 c pecans, roughly crushed or chopped
1/2 c shredded coconut (mine was unsweetened)
1/4 c sugar
1/2 tsp salt
In a shallow baking sheet, toast the pecans and coconut gently in a 350 degree oven (about 10 minutes). Put the sugar and salt in a saucepan over medium-low heat, stirring frequently, until the sugar melts and becomes a light caramel color. When it has melted, remove from heat and immediately add pecans and coconut to the sugar, stirring quickly to combine. Spread out again on the baking sheet, breaking up large clumps into good ice-cream-sized pieces. Let cool completely.
Freeze milk mixture according to your ice cream maker's directions. Add pecans during the last few minutes of freezing, just until well combined. Eat right away for soft serve ice cream, or transfer to a shallow container and freeze until firm [I froze this overnight and it got really firm, so I had to let it set out for 15 or so minutes].
Dish up and enjoy!

Wednesday, July 22, 2009

Weekend in WA

Yes, we had another weekend in Washington with the fam. It was fabulous! T's parents have a cabin on Lake Chelan and (because it's very cozy with (almost) the whole family there) they rented us our own little cabin a few docks down. I don't have a whole lot of time to post right this minute, but I wanted to let you all know I posted the pictures of our trip. What a fun weekend (we got tan, too!)

Tuesday, July 21, 2009

Operation Cookie Drop - Part III (Oatmeal Crisps)

Growing up, these cookies were associated less strongly with Christmas for us. Momma would often make these cookies in the summer because they took less work, the oven temperature was a bit lower for these than for other cookies, and they're relatively "hearty" (that is, as cookies go) :)

We didn't help much with these cookies, because there was so little work and because the dough was often crumbly until it was baked. So I'll just give you the recipe (I forgot to take pictures of these cookies). Being a "grown up" myself now, I really enjoy making these. They would be pretty easy to modify, too, if you wanted to make them healthier (using whole wheat flour, for instance, and honey and molasses, instead of sugar and brown sugar). Next time I make cookies just for eating (and not mailing), I'm going to do these and mix them up a bit. I think flax seed would also go well in these cookies!

Oatmeal Crisps

1 c crisco (or butter)
1 c brown sugar
1 c white sugar
2 eggs
1 tsp vanilla
1 1/2 c flour
1 tsp salt
1 tsp baking soda
3 c quick oats (or regular oats put in the blender/food processor to make them smaller)

Cream first 5 ingredients. Sift dry ingredients together and add to wet until combined. Dough may be a little sticky--this is ok.

Place two sheets of wax paper (about 18" long) on your work surface. Place half the dough on each sheet. Shape the dough into a log (using a spatula and the wax paper so your hands don't get too goopy) and roll it up in the wax paper. Place both logs in the refrigerator for 2 hours (or in the freezer for 30 minutes).

When dough is firm, remove dough from wax paper and place log on cutting surface. Using a sharp knife (I have the best success with a knife for soft cheeses), cut log into slices no more than 1/4" thick.

Place cookies on baking sheet and bake at 350 degrees for 10-12 minutes. Allow to cool completely before removing from tray (unless you used parchment paper, then just slide the paper off onto a cooling rack).


Cream cheese cookies in the front;
molasses in the middle;
oatmeal crisps in the back.
A tasty table, to be sure :)

Operation Cookie Drop - Part II (Molasses Cookies)

The second recipe I made was Molasses cookies :) These cookies are fantastic straight out of the oven, but if you bake them so they're still a little soft in the middle, they're also good months later :D not that they ever really lasted that long, unless Momma hid them from us.

I didn't realize how strong the taste memory of these cookies was for me until I took a bite of one last night. Y'know that scene in Ratatouille where Ego is transported to his boyhood and his Maman consoles him with a nice bowl of ratatouille? It was almost like that for me with this soft, warm, cookie--instantly I was back in my pajamas on Christmas morning walking around the hushed house, decorations twinkling in the sparse light before dawn, hand full of cookies of all kinds, inspecting the present piles that were stacked in various chairs and around the tree.

As kids we loved when Momma made these cookies (well, we liked it when Momma baked anything--it was always tasty) because the dough was soooo good. Though... we didn't like having to let the dough firm up in the refrigerator (these days I put mine in a shallow container and freeze it for a half hour, rather than waiting several hours with it in the fridge). But, whenever the dough was ready, Momma would spoon out the right amount and let us roll it into a ball, roll the ball in the sugar, and put the dark, sugar-coated deliciousness on the cookie sheet. The youngest ones usually weren't allowed to roll the dough, but they could roll it in the sugar and put it on the cookie sheet :) Momma usually had to shift the cookie balls once on the sheet--we didn't always place them far enough apart [the more cookies on the sheet, the sooner they're done. The sooner they're done, the sooner we get to EAT THEM!]

But anyway, here's the recipe :)
3/4 c liquid shortening (a nice, not-strongly-flavored oil)
1 c sugar
1/4 c molasses
1 egg
2 c flour
2 tsp baking soda
1/2 tsp cloves
1/2 tsp ginger
1/2 tsp salt
1 tsp cinnamon

Cream oil, sugar, molasses and egg together. Sift together dry ingredients and add to wet until well combined.

Transfer to shallow container and refrigerate several hours until firm (or freeze for about 30 minutes).

When dough is firm, roll into 1" balls and coat balls in white sugar. Place on cookie sheet about 2" apart.

Bake at 375 degrees for 8-12 minutes.

Operation Cookie Drop - Part I (Cream Cheese)

A friend suggested I participate in Operation Cookie Drop, and so last night, I baked many dozen cookies for a soldier overseas. (After a frustrating experience with the nearest post office (it being cloesd until August 31)), I mailed them this afternoon and even had enough leftover for my Wonderful Love to have some :) Renee said she didn't save any for her boys, but I also couldn't fit anymore into the box :]
The idea was to make cookies from scratch that remind you of home, so that the soldier feels a little less far away. I decided I wanted to make three different kinds of cookies 1) so that I only had to do single batches and 2) for more variety for my soldier.
The first cookie that came to mind when I thought of home was cream cheese cookies! I don't think this is a very common cookie in most homes, but growing up, it was a staple for us.
[Momma made so many cookies every year before Christmas that, even being a big family that had lots of people over and gave away plates of cookies anytime we went somewhere, we still had plenty of cookies come Christmas day and the whole Christmas season. I think she got the recipe from her Mother, since these seemed to be a comfort treat for her, too.]
I think one of the reasone cream cheese cookies remind me of home is because Momma never let us use the cookie press (we probably would have messed them up anyway). We could help mixing up the dough, and we always got the lick the beaters :) She would also let us pick out the discs for the shape of cookie she was going to press.
[For my cookies, I picked a flower/wreath thingy. I figured it's good for any seasons.] So Momma would fit the disc in and screw that to the front of the cylinder. Then she'd fill it with dough (which, 'round Christmas, was usually colored--red, green, or blue (for snowflakes!)) and begin to press.
And we would sit and watch her press cookie after cookie after cookie. When she ran out of dough in the cylinder she would refill it, sometimes mixing colors of dough, sometimes changing the disc in the press. As she pressed the cookies out, she would let us sprinkle them with the decorations we had all picked out. Red Hots on green wreaths; silver dragees [we never called them that] on the red flowers and bee-hive type things, and for the eye of the camels; blue sprinkles on snowflakes; etc., etc.
[I used red, white, and blue sprinkles for mine, since they're July cookies.]
Cream cheese cookies were always nice to munch on because they weren't too big. Even for little kids (or big kids with tiny mouths), they're just the right size for popping the whole cookie in your mouth. I like the soft buttery crumble of the cookie and the crunch of the decorations. These are also nice cookies (especially for gifts and holidays) because they're pretty easy to make and the cookies (almost) always turn out so beautiful!
If you don't have a cookie press, cookie stamps work, too (that's what I used before I got this nifty press [just like Momma's!] on ebay several months ago). Just roll the cookie dough into 1" balls and press with the stamp (which you may have to oil to keep the cookie from sticking). If you don't have cookie stamps, you can use the bottom of a cup to press the ball down, and put colored sprinkles on them (or just white sugar, that's pretty, too).
Here's the recipe if you want to try it :)
1 c crisco (I used a nice shortening from Whole Foods that's "heart healthy" or whatever)
3 oz. cream cheese
1 c sugar
1 egg yolk
1/2 tsp vanilla
2 1/2 c flour
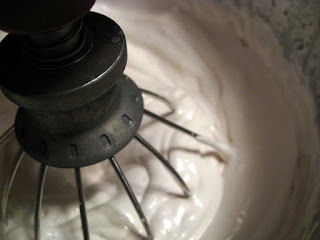
Cream shortening, sugar, and egg. Add remaining ingredients and mix well. Place dough in cookie press and go to town!
Or: roll dough into 1" balls and place on cookie sheet. Press down with cookie stamps (such as these).
Or: roll dough into 1" balls and flatten with the bottom of a drinking glass brushed with oil and dipped in sugar
Bake at 375 degrees for 12-15 minutes. Let cool before removing from cookie tray (the pieces of dough can fall apart if you're not careful). [If you put the cookies on parchment paper on the sheet, you can just slide the cookies onto a cooling rack and use the tray again.]

Wednesday, July 15, 2009

Cozy--in July?

137 - Cozy Originally uploaded by renidemus

Thank you, Renee for the wonderful knitted-ware! We LOVE it all :) Can't wait to wear our scarves when the temperature starts to drop!

And I just love the buttons on these teacup cozies!

All our love to you :)

S'Mores!

Some of you have asked for my S'Mores recipe. T and I enjoyed our first homemade s'mores with our friend Jen, who is leaving Boston soon :( It was a nice send off, though, and we are so glad of her friendship (and her willingness to be our guinea pig for new recipes)!
First you have to make marshmallows (these do need to dry out overnight, so prepare them at least a day ahead of time).
Then you need to make graham crackers. I made mine the day of, which worked out very well for us. I would love to try them fresh out of the oven, letting the chocolate melt on the warm cracker. Next time :)
I didn't make my own chocolate, but I suppose it could be done. I got some high-quality dark chocolate that we chunked ourselves. Good to nibble on while the marshmallow's toasting, too :)
Third, you need to roast the marshmallows. We used candles since we don't have access to any other fire. Quite cozy
Then you have to assemble your S'More in all it's ooey-gooey goodness!
Last step: Enjoy!

Tuesday, July 14, 2009

Graham Crackers

After going to Whole Foods and unsuccessfully locating some wheat-free graham crackers, I endeavored to make my own. I had spent a few minutes googling recipes and was beginning to get discourages (yes, that quickly) because most of the ones I found required refrigeration and I didn't have time for a fancy pastry dough before dinner needed to be ready. Then I found this recipe. Made me smile just to realize that there are other people like me--who want graham crackers NOW :)
Here's the recipe as I made them.

Gwam Crackers Makes about 24 3" crackers

1 1/2 cups whole-grain spelt flour 1/3 + cup brown sugar 1/2 teaspoon baking soda 1/2 teaspoon cinnamon (+ cinnamon to coat the spatula used to transfer to cookie sheet) scant 1/2 teaspoon salt 1/4 cup oil 1 teaspoon pure vanilla extract 1/4 cup rice milk (plus maybe an extra tablespoon or so), soy milk or water will work, too

Preheat oven to 350 F. Grease a light-colored baking sheet [next time I do these, I'm going to use a perforated pizza baking sheet and see how it turns out. I think it might make the crackers crispier].

In a large bowl mix together flour, sugar, baking soda, cinnamon and salt. Make a well in the middle and pour in oil, molasses and vanilla. Give the liquid ingredients a quick wisk with a fork and then continue mixing until everything is well combined and crumbly.

Drizzle in the milk and combine with a fork. You should be able to form a pliable ball of dough.

Line a work surface with parchment. Place the dough on the parchment and work into a rectangle. Flatten a bit with the palms of your hand and sprinkle with flour (or cinnamon). Use a rolling pin to roll into a rectangle that is roughly 10 x 14 inches. The dough should be about 1/8 inch thick. If the edges look crumbly, that’s okay.

Cut the edges off so that you have a relatively even 12 x 8 rectangle. Cut the dough into 8 crackers, to do this evenly use a sharp paring knife to slice the dough into approximately 3" x 2" rectangles.

Use a very thin flexible spatula to transfer the crackers to a baking sheet. [I dipped my small spatula into my cinnamon bottle (one of the big bottles from Costco) :) and the powdered coating worked well.]

Gather up the scraps of dough and form them into a ball, then roll it out into a 4 by 8 rectangle, or whatever size you can manage. I was able to get 4 more crackers out of the deal, but your mileage may vary. Cut the edges evenly and slice into 4 crackers then transfer to the baking sheet.

Score each cookie with a fork 4 times in 1 column. You don’t need to poke all the way through. Bake for 12 to 14 minutes. 14 will give you nice crispy crackers, 12 minutes will be better for making ice cream sammiches.

Let cool completely on the baking sheet.

I was pleasantly surprised at how well these turned out. They're a bit more substantial than regular graham crackers and they hold together a little better, too. More like a cookie and less like a crumbly-powdery-flakey thing.

Monday, July 13, 2009

The Final Frontier

After a nice lunch of roast chicken and potatoes (T is teaching his FIRST LSAT class tonight, so we had a nice lunch together rather than dinner) which Taylor prepared, Daddy and I walked down to the T-station to see Star Trek. On the way, we passed this funny tree in a fence:
And Daddy got to see the sign for one of his favorite songs: Charlie on the MTA :) (You can see the words on the sign if you click on the picture below). Fun times!
And Star Trek was just awesome. I can't wait to get our own copy of the original series on DVD and watch them like Momma did as she was cleaning the house and sewing. Also, it'll be fun for T to see them and laugh at all the jokes, characteristics, and -isms that they put into the movie :) Does anyone know when the Star Trek movie comes out on DVD?! I wanna get it!
Here's a cool picture of downtown Boston, against the wall of the Aquarium IMAX.
Posted by Picasa

Sunday, July 12, 2009

Daddy's Visit

My Daddy is in town this weekend! He's here on a "layover" (that is, a 3 1/2 day layover) on his way to VA to visit my brother and his family. Yesterday we found the Nation's Best Hot Dog at Boston Speed's (http://www.fandgcatering.com/) (based on this article from the Wall Street Journal). I will gratefully admit that it's all true--this is the best hot dog in America :) It's about a foot long and nearly 2" thick... "loaded" with all the tasty goodness a hot dog needs. Oh, so good...
Saturday we mostly spent sleeping and lounging. I made Boston Baked Beans (see recipe here), since we wanted to make sure Daddy got the full Boston experience :) I love this recipe--so tangy and so hearty. I also made a millet bread (since I didn't have any corn meal) and it went well with the beans.
Posted by Picasa
[Incidentally, I'm glad Daddy was able to rest so much on Saturday because I'm sure he'll be busy with all 5 grandkids when he goes down to Virginia!]
Today we mostly toddled around downtown Boston (got in a good 5 miles of walking, too!) and saw the Tall Ships in Charlestown Navy yard. It was thoroughly enjoyable going around with Daddy, the sailor, to see all the ships, because it was like getting our own private lecture on sailing trivia and information. In fact, he kept asking a trick question of all the sailors we encountered, "How many ropes are on a ship like this?" To get the answer, you'll have to visit my picasa album of the adventure:
We had a nice relaxing dinner this evening and watched Waking Ned Divine (great movie!). I'm looking foward to tomorrow when Daddy and I will go to Star Trek in IMAX! It's showing at the theatre at the aquarium (which we probably won't get to see. Next time!). So far, a great visit with my wonderful Daddy :)

Saturday, July 11, 2009

Love in a Pot!


Annie's Maple Baked Beans
[an all-day endeavor, but OH SO GOOD! Great for a day when you're going to be in and around the house all day anyway.]


soak the following overnight:
1 pound beans of choice (preferably not pinto)
(you can use one kind or have a mixture of Navy, Jacob's Cattle, Yellow Eye, Soldier, white, red, or black beans)
water to cover beans
2 T lemon juice or raw apple cider vinegar


In the morning, drain and rinse beans. Place in pot with 4 c cold water. Cover beans and bring to a boil. Reduce heat to medium-low and cook for one hour.


While the beans are cooking, prepare the following:
  1. in a large mixing bowl, stir together:
    1/2 c maple syrup
    1/2 c packed brown sugar
    1-2 tsp salt (to taste)
    1 tsp dry mustard
    1/2 tsp celery salt [or chop a celery stalk
    very thinly and add to other vegetables]
    1/2 tsp dry ginger
    1 tsp pepper
    1/2 tsp paprika
  2. add to the seasonings:
    2 c finely chopped onion (about 2 medium onions)
    1 large Granny Smith apple, cored and coarsely chopped
  3. fry 8 strips of thick-cut smoked bacon (or your favorite--we really like black forest bacon!). Drain on paper towels.
    [optional: chop bacon into small pieces and mix into bean mixture in next step]
Remove the beans from the stove. Pour beans (including liquid) into the maple syrup mixture and gently stir till well mixed.
Place 1/2 of bean mixture into a 3 qt. pan or dutch oven. Layer 4 pieces of bacon on top of beans. Add rest of bean mixture and top with remaining 4 strips of bacon.


Cover the dish and bake at 300 degrees for 5 hours (!) [I have done it for three before; you just have to make sure the beans are cooked all the way through and the veggies are tender]. Check every 2 hours and add water as necessary.


Serve with warm whole-grain bread, cole slaw, veggie soup, and apple sauce.
(let me know if you want a really good cole slaw recipe that goes with this)


Friday, July 10, 2009

(Sword) Fish in a Bag

I know I've already posted this recipe, but I made it again and changed a few things and it was just so good, I decided to post it again w/ new pictures :) Yummy fish!
1 large potato
2 curly garlic scapes, cut into 1" pieces
2 radishes
1 lb. fish of choice (we used fresh local sword fish this time--WOW! tasty)
2 green onions
2 medium tomatoes
olive oil
1-3 T white wine
salt and pepper to taste
fresh basil for garnish
Slice the potato into thin (no more than 1/4") slices. Place on long sheet of foil and drizzle with a little olive oil.
Place the fish on top of the potatoes and then layer the rest of the vegetables how you please (I put the radishes on the potatoes that stuck out from the fish, then the green onions and garlic scapes on top of the fish, and topped it off with sliced tomato.
Once all the veggies and fish are arranged, drizzle the mountain of goodness with a little more olive oil and add salt and pepper to taste (you don't need a whole lot of either if the fish is good--it's mostly for the vegetables). Finally, pour the white wine on top of everything, making sure it does not fun over the edge of the foil.
Bring opposite edges of the foil together and crimp closed. Repeat with the other two corners. Pinch together all edges of the foil to make a nice tight seal all around.
Place baking sheet in 400 degree oven and bake for 20 minutes or until fish flakes easily (you'll have to open the bag a bit to check the fish. If it's not done, seal everything back up and bake it some more). When finished, arrange all the stuff on plates (serves two hungry people). Goes well with a nice salad, but it's mostly a one-bag meal.
And oh so delicious :)

Marshmallows!

Did you know you can make marshmallows at home?! I thought those things were on the periodic table or something!
Well, I found a good recipe and decided to try it, since I was craving some rice crispy treats... but we didn't have any rice crispies either, so I used popcorn instead :)
For the marshmallows-

Ingredients: 3 T. of unflavored Gelatin

1 c. chilled filtered water

1.5 c. organic cane sugar

1 c. agave nectar

1/4 tsp. salt

1 tsp. real vanilla extract

1/4 c. powder sugar

1/4 c. corn starch

Chill your metal mixing bowl and whisk attachment(s).

Place chilled bowl on base of stand mixer and attach whisk.

Start by putting gelatin into bowl.

Add 1/2 c. chilled water

In medium saucepan combine remaining water, cane sugar, agave nectar and salt. Cover and cook for about 3 minutes. Uncover and continue to cook until mixture reaches about 235-240 degrees F (soft ball stage). Once temperature is reached remove from heat.

Now, turn your stand mixer on low. Slowly add hot mixture to gelatin. When all syrup is added, put mixer on high. Continue to whip until mixture becomes thick and temp cools. Add the vanilla and whip for about a minute longer.

This mixture will whip for 10-15 minutes. So, prepare your pans while it is mixing.

Spray a 13 x 9 inch rectangular pan with non-stick cooking spray. Combine powder sugar and corn starch (I used arrworroot flour) in a small bowl. Sprinkle mixture in pan, cover pan and shake to fully coat.

Now you can add the mixture to the pan. It is difficult to spread. Use a rubber spatula coated with non stick spray. Once spread out in the pan, sprinkle the top with more of the sugar/cornstarch mixture, cover w/ foil and allow to set up over night. Cut into 1 inch pieces and store in zip top bag at room temp.

If you're making popcorn or rice crispy treats, add about 1 T of oil or melted butter to the marshmallow after it is done mixing (since you need melted marshmallow, you don't need to wait for it to harden) . You only need a scant third of the marshmallow from the above recipe for 1/2 cup (un-popped) popcorn. Mix the marshmallow and oil, then add the popcorn and combine well. Press into a greased pan and let cool.
Posted by Picasa

Thursday, July 9, 2009

365 Days. A Summary To Date (Day 136)

The 365 photo project was designed, I think, to do several things. Some of these things coincide with my reasons for beginning it. For instance,
  • helping the photographer become more aware of her surroundings and take picture opportunities whenever they arise
  • documenting an entire year of one's life in pictures which helps one recall what happened that day
  • (hopefully) becoming a better photographer
Although there are days (often many in succession) where I will forget to take a picture until soon before bed (hence the pictures of our orchids, for example), I think I have become more generally aware of picture opportunities. The 365 project has definitely trained me to take my camera (yes, it's only a little point and shoot) with me wherever I go, and that certainly lends itself to more pictures taken :) There are also times when I'm too lazy to get my camera out when I see something that might make a good picture (especially if it's rainy or I'm in a hurry).
I have successfully documented the beginning days of my first year of photographs. I do not know if I will continue the trend of daily photographs after this year is completed, but it's not an idea I'm opposed to. I might not make it as regimented and regular an occurence, but I do like the idea. We'll see.
Also, I do think I have become a better photographer. Not a great one, but better than I used to be.
---
But the most interesting things I have learned from this project are applicable to photography, and life in general.
I have learned that somedays will present faulous photo
opportunities and that by chance, or Providence, or luck (whatever you call it), I am able to capture the moment in a photo that turns out great! These moments have been my favorite pictures from my set.
128 - Joy is Like the Rain
There are other days that don't particularly stand out, where the moments aren't glamorous or spectacular or stunning. Just ordinary days that give me a chance to look extra hard for picture-appropraite materials.
Sometimes they're cool:
122 - Tree and Leaf
Sometimes they're less cool :)
82 - Green Road
Other times I have to carefully stage a "moment" that will capture well :) These are fun for me because I always wonder if people can guess whether they're staged or just random moments I was quick enough to catch. Can you guess with these?
47 - Good Friday
What about these?
Day 27 - Liesl
And sometimes, I wait for a good moment to re-create itself :) I was sitting on the couch with T and the breeze was blowing the curtain up like this. So I got up, got my camera, and sat back down, waiting for the breeze to come back... hehe
98 - Breezes
----------------------------------------------
Things I've learned about myself since starting this project:
I prefer by far photographing people rather than objects. There are some occasions where I can make objects look good, or when I find one that looks good on its own:
But for the most part, people are just more fun, and they make for better pictures :)
Day 38 - Thugs
----------------------------------------------
I really like color. I have made very few photographs black and white. I guess I like the richness of the color.
But it's probably also due to my lack of vision for a black and white world. I'm no Ansel Adams :)
----------------------------------------------
My philosophy on getting a great photograph: the more pictures you take, the more likely you are to end up with a half-way decent picture :) Here is one (very, very rare) example of several pictures that all turned out well
130 - Dip
----------------------------------------------
I like photography! I mean, I always liked taking pictures, but since starting this project, I have realized that I really enjoy being behind the camera (even my bitty Elph), creating memories I can share with people and treasure myself.
Day 7 - My Folks
I love you, Momma and Daddy :)
----------------------------------------------
In conclusion (congrats for making it to the end!), I am very glad that I started this project when I did (the beginning of Lent). If I had waited till Easter, I would have missed the last 10 days of Momma's life and her funeral, our time together as a family after her death, and so many wonderful memories that I won't forget now. I'm contemplating putting all 365 pictures into a photo book at the end of my year, but we'll see how that works out. Photo books are spendy, and 365 pictures take up a great many pages.
Anyway, here's to photography! And many more pictures to come.
Here's my whole set on flickr:
And my picasa page, that has pictures of events and projects I've done: